1) Adding a New City - How to add a new city for WeatherMan to monitor
2) Main Window and Changing Units of Measure - A frequently asked question
3) City Preferences - Explanation of everything in city preferences
There are two ways of adding a city. The first is to choose "New U.S. City" or "New International City" from under the "File" menu in the menubar.
The other is to use the "City Manager" window. Choose "City Manager" from under the "Cities" menu in the menubar. You get this window.
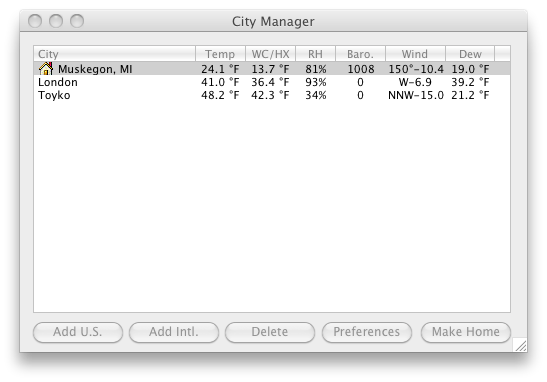
Here you can choose the "Add U.S." button or the "Add Intl." button. They both have the same effect as the menu items. Choosing "Delete" deletes the city. Choosing "Preferences" takes you to the preferences specific for that city. Instructions for preferences are detailed in Section 3.
Adding a new U.S. city bring up the U.S. City Lookup Window
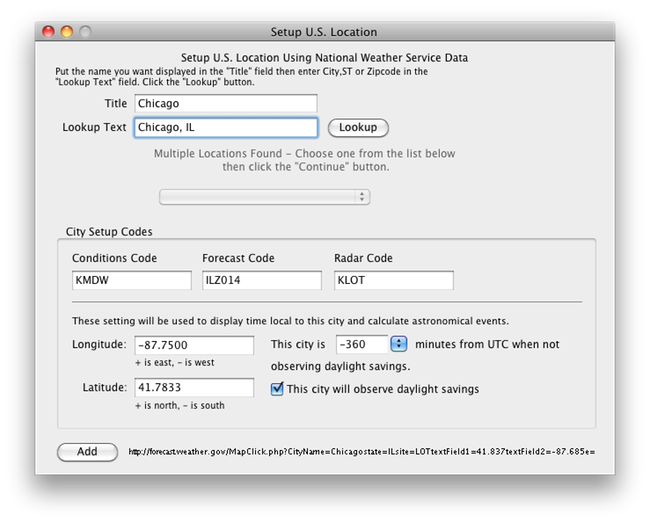
In the "Title" field just put whatever you would like to name this city. What you put here has nothing to do with how the city will be located in the database. So put "Chicago" or "The Windy City" or "Chi Town", whatever you like.
The "Lookup Text" field is where we put the text we'll use to get the information we need about a city to gather the weather information. Typically you just put a ZIP Code or "City, ST" combination. Then, click the "Lookup" button.
WeatherMan will then go out to the Internet looking for the data about the city.
Conditions Code - Usually the code of your nearest airport that is reporting hourly weather conditions and observations.
Forecast Code - Code assigned by the National Weather Service used to get the forecast information about an area. This code is also called a "Zone Code" and typically is a reference to an entire county.
Radar Code - Code that corresponds to the closest NEXRAD radar location to this city.
Longitude and Latitude - The longitude and latitude of the airport references in "Conditions Code". You can adjust this to be the latitude and longitude of your house, if you know it, to get a more accurate forecast.
City's Time Zone - Here you specify for this city how many minutes from UTC time it is when not observing daylights saving. This allows WeatherMan to show times in the main window in your local time zone as well as the city's own time zone. Also check if this city observes daylight savings during the summer.
When all the information is filled in click the "Add" button to start the new city.
Section 2 - City Window and Changing Units of Measure
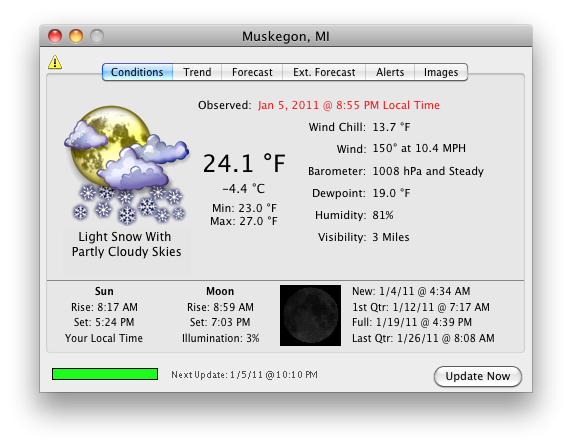
The City Window and its tabs show all the weather information gathered about a city.
1) Conditions - Current conditions for the airport specified when setting up the city. Usually reported hourly. Change the units of measure by directly clicking on them in the window. There is no universal preference for this. All units are remembered independently.
All of the Sun and Moon data are calculated directly by WeatherMan using formulas from the book "Astronomical Algorithms, 2nd ed." by Jean Meeus. And are based on the latitude and longitude provided for this city.
If you see the "Alerts" symbol in the upper left corner of the screen, clicking on it takes you to the "Alerts" tab. This icon is only shows if there are active alerts.
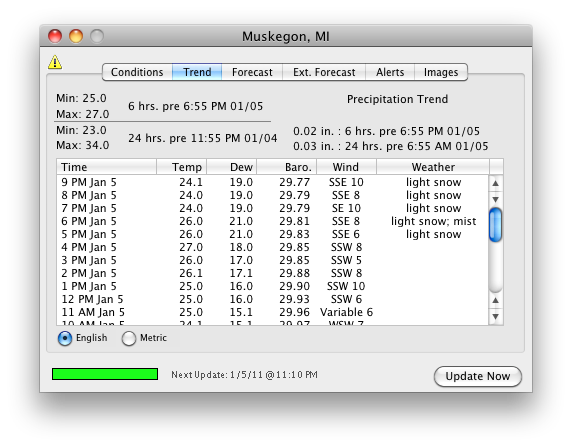
2) Trend - Shows the last 24 hours of conditions data for this city. Also shows the minimum and maximum temperatures over the last 6 and 24 hours for the city and the precipitation reported over the last 6 and 24 hours.
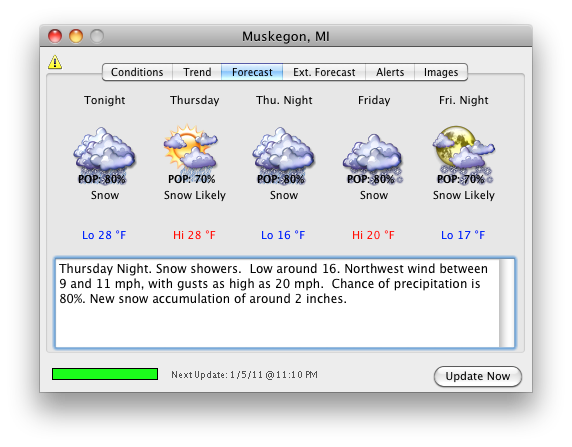
3) Forecast & Extended Forecast - These two tabs show the upcoming forecast for the city. Point your mouse on each day to see the text forecast for that day.
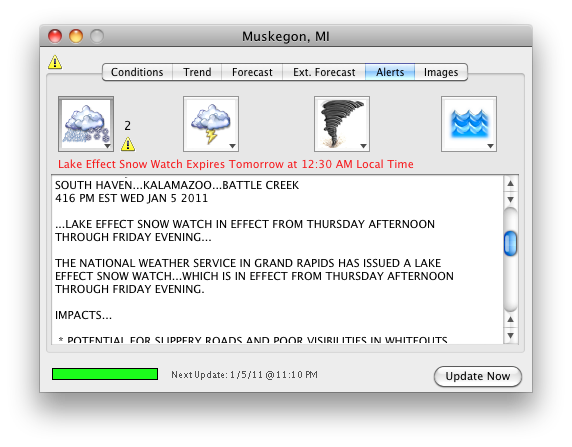
4) Alerts - Shows any current weather alerts for the city. The alerts are broken down into 4 sections. Special Weather Statements, Thunderstorm Watches and Warnings, Tornado Watches and Warnings, Flood Statements.
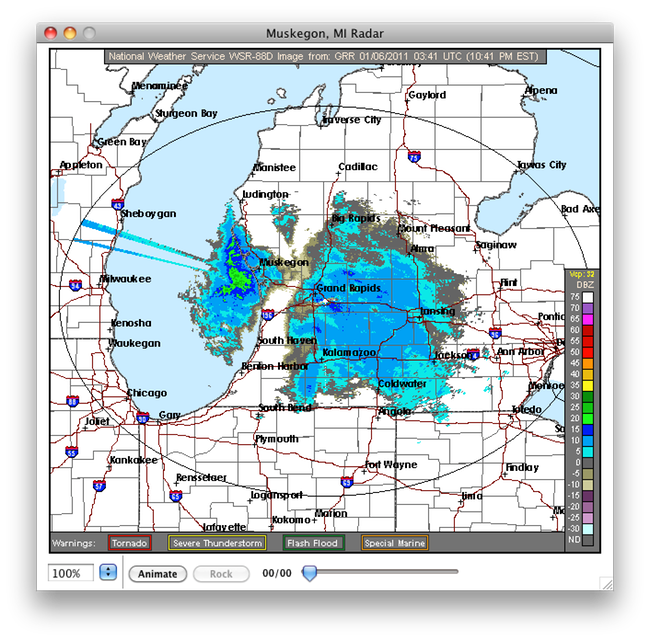
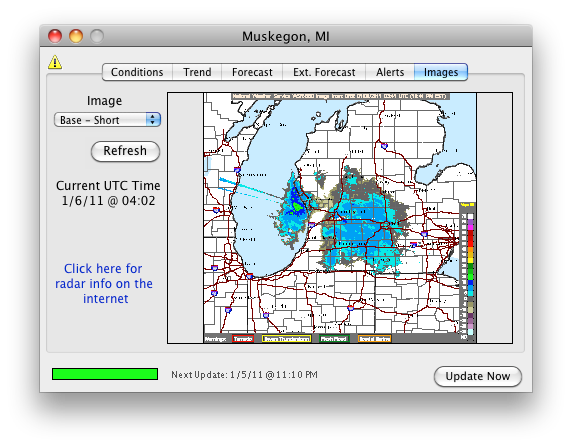
5) Images - This is used mostly for the radar images available for this city. Use the drop down menu to change the type of radar image displayed. The image will refresh periodically but you can use the "Refresh" button to force an update to the latest image.
If you click directly on the image it will expand to a large size and animation controls will be available.
Coming soon. In the mean time explore the settings they are pretty self-explanitory.

